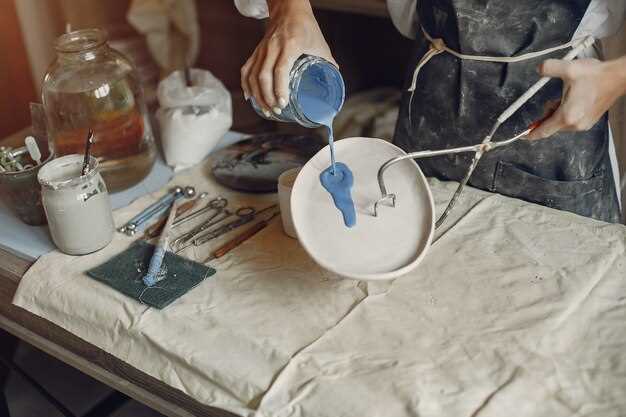
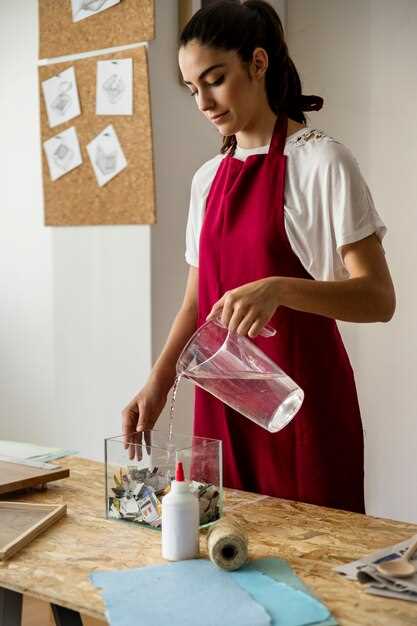
Join a glass art workshop and experience the magic of transforming molten glass into stunning pieces of art. Guided by experienced artisans, you will gain practical skills in glassblowing, fusing, and casting. Each session provides hands-on opportunities to create your own masterpieces, allowing you to express your creativity while learning techniques that have stood the test of time.
The workshops cater to all skill levels, making it easy for beginners to get started. You’ll receive personalized instruction, ensuring that you grasp the fundamental concepts and build a strong foundation. As you work alongside masters in the field, their insights and tips will enhance your understanding and inspire new ideas.
Consider signing up for a weekend intensive or a week-long course to immerse yourself in this art form. You’ll not only leave with beautiful creations but also a deeper appreciation for the craft. Participating in a glass art workshop offers an excellent way to connect with fellow art enthusiasts and enjoy a unique, hands-on learning experience.
Exploring Different Techniques in Glass Art
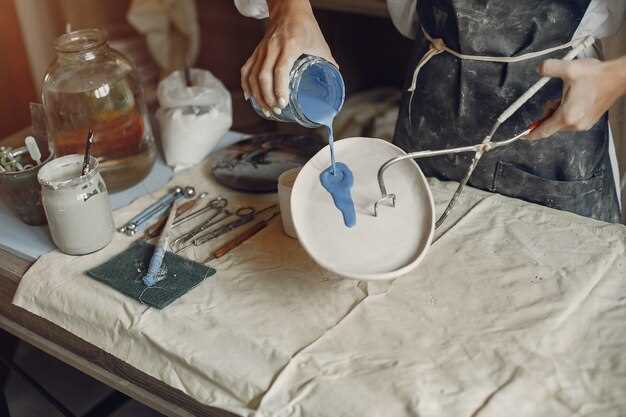
Begin with glassblowing, a classic technique where molten glass is shaped using a blowpipe. This method requires precision and timing as you inflate the glass and manipulate it into desired forms. Practice is crucial; even small adjustments can lead to stunning variations in the final piece.
Next, try glass fusing, which involves layering pieces of colored glass and heating them in a kiln. This technique creates beautiful, seamless designs and allows for creativity in patterns. Start with small projects to get a feel for temperatures and timing, as these factors play a significant role in the final result.
Explore glass casting by pouring molten glass into molds. This method produces complex shapes and textures. Consider using different materials for molds, such as sand or metal, to achieve unique effects. Experimentation is key here, as varying temperatures can alter the finish dramatically.
Engage in stained glass art, where colored glass is cut and assembled using lead or copper foil. This technique allows for intricate designs and storytelling through color and light. Start with simple designs before tackling larger panels to develop your skills in cutting and soldering.
Investigate sandblasting, which etches designs onto glass surfaces using abrasive materials. This technique adds texture and depth to your work. Begin with stencils to practice control and precision. As you improve, experiment with layering techniques to create more complex visual effects.
Finally, consider glass engraving, where detailed images are carved into the glass surface. This method requires a steady hand and good tools. Start with simple patterns or text, gradually progressing to more intricate designs as your confidence grows.
By practicing these techniques, you can develop your own unique style and expand your skills in the world of glass art.
What to Expect in a Glass Fusing Class

Prepare to gather at the workstation equipped with various types of glass, tools, and safety gear. In your first session, instructors introduce you to fundamental techniques such as cutting, layering, and arranging glass pieces. You will quickly get hands-on experience, so wear comfortable clothing and closed-toe shoes.
Hands-On Experience
Each class focuses on creating specific projects, ranging from coasters to small bowls. Expect to learn how to use a glass cutter properly, apply adhesive, and manage various glass types like fusible, opaque, and transparent. Throughout the process, instructors provide real-time feedback and assistance, helping you refine your skills. Prepare to experiment with colors and patterns as you bring your unique vision to life.
Firing Process
After assembling your pieces, the class moves on to the firing stage. You’ll learn about the kiln and how it operates, understanding the different firing schedules that affect the final product. Anticipate engaging discussions about the science behind glass fusing, which will enhance your appreciation for the artistry involved. Once fired, you return to see the transformed pieces, often experiencing a sense of pride in your creative output.
Essential Materials for Glass Fusing Projects
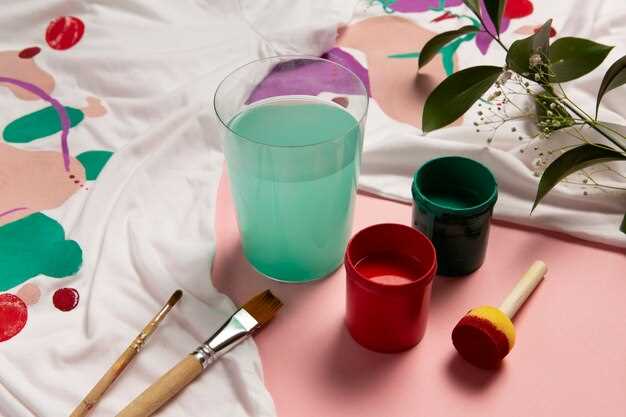
Glass fusing requires specific materials to achieve desired outcomes. Begin with a reliable kiln, as it controls the temperature crucial for achieving optimal results. Look for kilns designed specifically for glass fusing, ensuring they have precise temperature settings and even heat distribution.
Choose high-quality glass in sheets or shards. Bullseye and Spectrum glass are popular choices, known for their varied colors and compatibility. Be sure to select compatible glass types to avoid issues during the fusing process.
Adhesives and Tools
Invest in suitable glass adhesives. These will support your projects before firing. Also, acquire tools like glass cutters, running pliers, and grinders to shape and refine your pieces for seamless assembly. Safety gear, including goggles and gloves, is crucial for protection during cutting and handling.
Additional Supplies
Include kiln wash to prevent your glass from sticking to kiln shelves. Use fiber paper for delicate pieces to provide extra separation during firing. Keep small pieces of glass tubing or frit on hand for adding intricate designs and textures. Finally, have a clean workspace for creating and assembling before firing, ensuring the best results in your glass fusing endeavors.
Step-by-Step Guide to Etching Glass at Home
Choose a clean piece of glass, such as a window pane, mirror, or glassware. Ensure it’s free of dust and grease for the best results.
Materials Needed
- Glass item for etching
- Glass etching cream
- Masking tape
- Stencil or design template
- Paintbrush or small sponge
- Protective gloves
- Safety goggles
- Water and sponge for cleanup
Etching Process
- Apply the stencil to your glass item using masking tape. Make sure it adheres well to prevent etching cream leakage.
- Put on protective gloves and goggles. Safety first!
- Using a paintbrush or sponge, carefully apply the glass etching cream over the exposed areas of the stencil. Follow the manufacturer’s instructions for the cream’s application time.
- After the recommended time, rinse the glass thoroughly under water to remove the etching cream. Make sure to do this in a sink, keeping the cream away from other surfaces.
- Carefully remove the stencil and masking tape. Rinse the glass once more to ensure all residue is gone.
- Let the glass dry completely before displaying or using it.
Enjoy your custom-etched glass piece, showcasing your creativity and skill!
Common Mistakes to Avoid When Etching Glass
Avoid using the wrong type of glass. Ideally, use soda-lime glass or crystal, as they work best with etching techniques. Industrial glass often contains additives that can react unpredictably with etching agents.
Inadequate Surface Preparation
Always clean the glass thoroughly before starting. Dust, grease, or fingerprints can interfere with the etching process. Use a glass cleaner and lint-free cloth to ensure a spotless surface.
Poor Masking Techniques
Utilize high-quality masking materials to achieve crisp lines. Inconsistent or loose masking can result in smudged designs. Take your time to apply the mask evenly, ensuring it sticks well at the edges.
Neglecting safety measures is another common pitfall. Always wear protective goggles, gloves, and a mask, especially when handling acids or abrasive materials. Prioritize your safety throughout the process.
Don’t rush the etching process. Allow sufficient time for the acid to work on the glass. Check regularly, but avoid excessive handling during the reaction time to maintain design integrity.
After etching, don’t skip the rinsing step. Wash the glass thoroughly with water to remove any residual etching material. Failure to do so can lead to unwanted reactions or stains.
Lastly, don’t underestimate the importance of practice. Start with simple designs to build your skills. Familiarity with tools and materials greatly enhances your etching outcomes.
Creating Stunning Stained Glass Windows: Techniques and Tips
Begin with quality materials. Select high-grade glass that showcases color and texture. Consider using hand-blown glass for unique patterns or etched glass for a more refined look.
Plan your design carefully. Use sketches to visualize your concepts. Break down the design into smaller sections, ensuring each piece fits harmoniously within the overall image.
Cutting glass requires precision. Use a glass cutter to score the surface and apply gentle pressure to snap the glass along the line. Keep a steady hand for clean edges and wear safety goggles for protection.
Keep your workspace organized. Maintain a designated area for glass pieces, tools, and safety equipment. This will minimize accidents and enhance productivity.
Use copper foil or lead came for assembly. Copper foil works well for intricate designs, while lead came is excellent for larger pieces. Both methods provide strength and flexibility in structure.
Apply solder with steady hands. Use a soldering iron set to an appropriate temperature and ensure the solder fills the seams completely for a secure bond. Practice on scrap pieces to refine your technique.
Incorporate a patina for a professional finish. A dark patina can enhance the contrast of colors, giving depth to your work. Rinse the stained glass with water after applying patina to remove any excess.
Finally, consider lighting. Backlighting can transform your stained glass into a stunning focal point. Experiment with different angles to showcase the colors and textures effectively.
With practice and attention to detail, your stained glass windows can reflect personal style and artistic vision.
Best Practices for Cutting Glass Safely and Accurately
Always ensure you wear safety goggles and gloves before beginning the cutting process. This protects your eyes and hands from potential injury. Prepare your workspace by clearing away any distractions and placing a protective covering on your work surface to catch small shards.
Tools Selection
Select a high-quality glass cutter that suits your project. A wheeled cutter or a carbide cutter can provide cleaner cuts. Additionally, keep a straight edge or ruler on hand to guide your cuts accurately.
Cutting Technique
Secure the glass on a stable surface. Align the straight edge where you want your cut and press the glass cutter firmly against it. Use a consistent and moderate pressure when scoring the glass–too little won’t create a proper score, while too much may cause cracks. Score the glass in a single, smooth motion.
| Tip | Description |
|---|---|
| Scoring | Make one continuous score line without retracing. |
| Breaking Glass | Use your hands (or a designated tool) to snap the glass along the scored line. Apply pressure from underneath while gently pressing down. |
| Cleaning Edges | After cutting, use a glass grinder or sandpaper to smooth sharp edges for safety. |
After making your cut, inspect the edges carefully. Proper handling and storage will help maintain your safety and the quality of your work. Follow these practices to enhance your glass-cutting skills and ensure a safer workshop environment.
Market Research: Understanding Your Audience for Glass Art
Identify your target audience by analyzing demographics such as age, income level, and interests. Use online surveys or social media polls to gather data about preferences related to glass art styles, techniques, and the types of products they purchase. Focus on specific segments like home decor enthusiasts, artists, or collectors, tailoring your offerings to meet their desires.
Research Methods
Utilize various research methods to gain insights. Conduct interviews with glass art buyers and attend art shows to engage directly with potential customers. Explore forums or online communities where discussions about glass art occur. Analyze competitors to understand their audience and offerings, identifying gaps your work can fill.
Data Compilation
Compile the data you collect and organize it into actionable insights. Segment your findings into categories such as preferences for color, form, and price points. This approach allows you to adjust your marketing strategies effectively.
| Demographic | Interest Level | Preferred Style | Price Range |
|---|---|---|---|
| Art Collectors | High | Unique Sculptures | $500+ |
| Home Decor Enthusiasts | Medium | Functional Art | $50-$300 |
| Craft Hobbyists | Low | DIY Kits | $10-$50 |
Engaging with your audience through personalized marketing can enhance conversions. Share behind-the-scenes content, demonstrate techniques, and create interactive posts to encourage feedback. This fosters a connection with your audience and cultivates loyalty, guiding your glass art practice towards success.
How to Photograph Your Glass Art for Better Sales
Use natural light whenever possible. Position your artwork near a window to capture its colors and transparency without harsh shadows. Avoid direct sunlight, which can create undesirable glare.
Set Up Your Background
Choose a simple, uncluttered background to let your glass art shine. White or neutral-colored backdrops work well to highlight the clarity and details of your pieces. Consider using a solid color that contrasts with your art.
Experiment with Angles
- Capture multiple angles. Shoot your glass art from different perspectives to showcase its form and texture.
- Incorporate close-ups for intricate details. Highlight any craftsmanship or unique features that set your work apart.
- Try varying the height of your shots. Low and high angles can provide more dynamic visuals.
Utilize a tripod for stability if your camera has a slow shutter speed. This prevents blurriness and maintains focus on details.
Edit for Precision
After photographing, use editing software to refine images. Adjust brightness and contrast to enhance vibrancy without overdoing it. Cropping can also help remove distractions.
Share your final images on multiple platforms. Utilize social media and your e-commerce site to maximize visibility. Consistency in presentation strengthens your branding and attracts potential buyers.
Utilizing Social Media to Sell Your Glass Art
Create an engaging profile that showcases your unique style. Use high-quality images of your glass art, ensuring the lighting highlights the intricacies. Write a clear bio that reflects your artistic identity and passion for glass art.
Leverage platforms like Instagram and Facebook for visual storytelling. Share posts that capture the creation process, such as time-lapse videos or step-by-step guides. This transparency builds a connection with your audience.
Host live sessions to demonstrate techniques or answer questions. Interacting in real time encourages immediate engagement and fosters community. Promote these events ahead of time to maximize participation.
Use relevant hashtags to enhance discoverability. Research popular tags within the glass art niche and combine them with unique ones related to your work. This practice expands your reach beyond your immediate followers.
Collaborate with other artists or influencers. Consider joint projects that blend your styles, increasing exposure to new audiences. Share each other’s work to provide mutual support and attract diverse followers.
Encourage customer interaction by sharing user-generated content. Ask satisfied buyers to post photos of your art in their homes. Feature these posts on your profile, which builds trust and showcases the appeal of your work.
Run contests or giveaways to spark interest. Entice followers to share your art for a chance to win a piece. This strategy not only boosts engagement but also spreads awareness about your glass art.
Track analytics to refine your approach. Monitor what type of content garners the most engagement. Use this data to continually adapt your strategy and focus on what resonates with your audience.
Engage consistently with your followers. Respond to comments and messages promptly. Building relationships fosters loyalty and can lead to increased sales.
Promote your products directly in posts and stories. Use shoppable tags on platforms that support them, making it easy for customers to purchase. Provide links to your online shop in your bio or posts to streamline the buying process.
Consider offering exclusive social media promotions. Let your followers know they can access special deals or early releases through your social platforms, incentivizing them to stay connected.
Pricing Your Glass Art: Factors to Consider
Begin by calculating the cost of materials. Gather details on glass types, tools, and any additional supplies needed. Track your expenses diligently to ensure accurate pricing.
Include the time spent creating each piece. Estimate the hours dedicated to design, crafting, and finishing touches. Factor in your skill level and experience, as these can influence how you value your time.
Consider the complexity of your work. Intricate designs or specialized techniques may warrant higher prices due to the expertise required. Evaluate your portfolio to identify pieces that showcase your unique style and craftsmanship.
Research similar artworks in the market. Visit galleries and online platforms to analyze pricing strategies used by other glass artists. This will help you understand your competitive landscape and position your art appropriately.
Reflect on customer demand. Pay attention to what collectors or enthusiasts are seeking. If there’s a trend towards particular styles or themes, adjust your pricing accordingly to align with current interests.
Account for your overhead costs. Include studio rent, utilities, and marketing expenses in your pricing model. Ensure that the final price reflects the true cost of running your art business.
Finally, be open to feedback. Engage with customers and fellow artists to gain insights on how your pricing aligns with their expectations. Use this information to refine your approach over time.
Building an Online Presence: Websites and Marketplaces for Art
Create your own website to showcase your glass art. Utilize platforms like Wix or Squarespace which offer user-friendly templates tailored for artists. Highlight high-quality images of your work, add descriptions, and share your creative process through a blog section.
Join specialized art marketplaces such as Etsy or Artfinder. These platforms connect you directly with art enthusiasts looking for unique pieces. Create an attractive shop profile, optimize your listings with relevant keywords, and engage with potential customers through the platform’s messaging system.
Utilize social media to broaden your outreach. Instagram and Pinterest serve as excellent visualization tools where you can share images of your creations, conduct live demonstrations, and interact with followers. Regularly post updates, stories, and behind-the-scenes content to keep your audience engaged.
Consider participating in online exhibitions. Websites like Saatchi Art or Artsy facilitate virtual galleries where you can display your work. This exposure can lead to new followers and potential sales while allowing you to network with other artists and galleries.
Leverage email marketing to keep your audience informed about new pieces, upcoming workshops, or sales. Services like Mailchimp offer simple tools for creating visually appealing newsletters that help maintain engagement with your followers.
Maintain consistent branding across all platforms. Use the same logo, color scheme, and tone of voice in your communications. This helps create a recognizable identity that potential customers will remember when looking for glass art.
Video:
Glass artist Manolo Aguilera creates a traditional Venetian goblet with gold leaf
Glass artist Manolo Aguilera creates a traditional Venetian goblet with gold leaf by Greg “gmanonfire” Owen 2,162,966 views 6 years ago 16 minutes
Q&A:
What skills or techniques will I learn in the Glass Art Workshop?
The Glass Art Workshop is designed to teach participants a variety of skills, including glassblowing, fusing, and sculpting. You will have the opportunity to work with different types of glass and learn from experienced artisans who will guide you through the processes. The workshop will cover techniques such as shaping, coloring, and finishing glass pieces, enabling you to create your own unique artworks.
Do I need any prior experience to attend the workshop?
No prior experience is required to attend the Glass Art Workshop. The program is suitable for beginners as well as those with some background in glass art. The instructors will provide step-by-step guidance, ensuring that everyone can follow along and learn at their own pace. Participants will also receive safety training, which is essential when working with glass and high temperatures.
What materials and tools are provided during the workshop?
All necessary materials and tools for the Glass Art Workshop will be provided. This includes glass of various colors and types, tools for cutting and shaping, and safety gear such as goggles and gloves. The workshop aims to create a supportive environment where you can focus on your creativity without worrying about acquiring materials beforehand.
How long does the Glass Art Workshop last, and what is the schedule like?
The duration of the Glass Art Workshop typically spans several hours or can extend over a weekend. Each session includes demonstrations, hands-on practice, and ample time for participants to work on their projects. A detailed schedule will be provided upon registration, outlining break times, project phases, and opportunities for individual guidance from the instructors.
Can I take my glass creations home after the workshop?
Yes, participants are allowed to take their glass creations home after the workshop. Depending on the techniques used, some items may need to go through additional cooling or finishing processes. The instructors will guide you on how and when your pieces will be ready for pickup, ensuring they are safe and properly handled before taking them home.
